

Halloween decoration storage ideas solve the November problem every decorator faces: the porch is full of ghosts, skeletons, and string lights, the candy is gone, and everything has to come down before the rain ruins it. A pile of decorations shoved into one bin comes back next October as a tangle of dead lights, a squashed mask, and a wreath that has lost its shape. The fix is a small system to pack away halloween decorations — clean, sort, pack by material, and label — that takes one afternoon and saves next year’s setup. These halloween decoration storage ideas cover lights, masks, inflatables, wreaths, and costumes, so the whole collection comes out ready next October.
Most Halloween decorations fail in storage for the same two reasons: they go away damp, and they go away squashed. A latex mask folded into a crowded bin comes out creased and sticky, and a set of string lights tossed in loose comes out as a knot you will spend an hour untangling. Packing by material instead of by size fixes both problems at once, because a fabric ghost, a plastic skeleton, and a string of lights each need a different kind of protection. This guide walks through the whole pack-away, from the first photo of your display to the labeled bin on the shelf, and by the end of it you will have halloween decoration storage ideas that work for a small apartment closet or a full garage of props.
You will learn how to sort and photograph your display before you take anything down, clean each material the right way, store string lights so they never tangle, pack masks and costumes so they keep their shape, fold inflatables without cracking them, and pick bins and a storage spot that keep everything safe until next October.
Photograph and Sort Before You Pack Anything
Take photos of your display before you take a single thing down. A quick phone photo of the porch, the mantel, and the front window shows you exactly where the ghosts hung, which lights wrapped the banister, and how the wreath sat on the door. Next October you will open the photos instead of guessing, and setup takes half the time. Photograph the cords too — a shot of which plug went where saves a lot of crawling behind furniture later.
Sort everything into four piles as you take it down: keep, repair, toss, and donate. Keep means clean and sound, something you will display again. Repair means a torn seam, a dead bulb, or a loose joint you can fix in five minutes with glue or a spare bulb. Toss means broken beyond a quick fix, moldy, or missing a key part.
Donate means a costume or decoration in good shape that you simply do not love anymore — a school or a neighbor will use it. Sorting first is the simplest way to store halloween decorations, because every bin you pack holds only things worth keeping.
Pull the real pumpkins out of the mix before you pack anything else. A carved pumpkin rots fast, and an uncarved one lasts longer as fall decor on the porch, but neither belongs in a storage bin. Compost the carved ones within a few days of Halloween, and keep uncarved pumpkins out until they show soft spots. Fake foam pumpkins are different — wipe them down and pack them with the rest of the collection, because they last for years when they stay dry.
Clean Everything and Let It Dry Completely
Nothing goes into a bin dirty or damp. Dust and fake blood left on a decoration for a year turn into stains and smells, and moisture trapped in a sealed bin grows mold while you are not looking. Wipe plastic, resin, and ceramic pieces with mild soap and water, then dry them with a towel and leave them out to air-dry fully. Brush the dust off fabric ghosts, shake out fake cobwebs outside, and spot-treat costume stains while they are still fresh.
Inflatables need extra care. Let them run for an hour on a dry afternoon to blow out any moisture inside, then deflate them and let the fabric air-dry completely before you fold anything. A damp inflatable folded into a bin comes out smelling musty and can crack along the creases. The same rule applies to every piece: if it feels even slightly damp, give it another hour in the air. Dry storage starts with dry decorations, and a little patience here saves the whole collection.
Take the batteries out of everything. Battery-powered candles, light-up signs, animated figures, and remote controls all use batteries that can leak and corrode the contacts over a year in storage, and heat makes it worse. Remove batteries from every piece, toss the spent ones, and keep the good ones in a small labeled container away from metal objects. This one step protects the most expensive pieces in your collection, and it takes about two minutes per decoration.
Store String Lights and Light-Up Decor
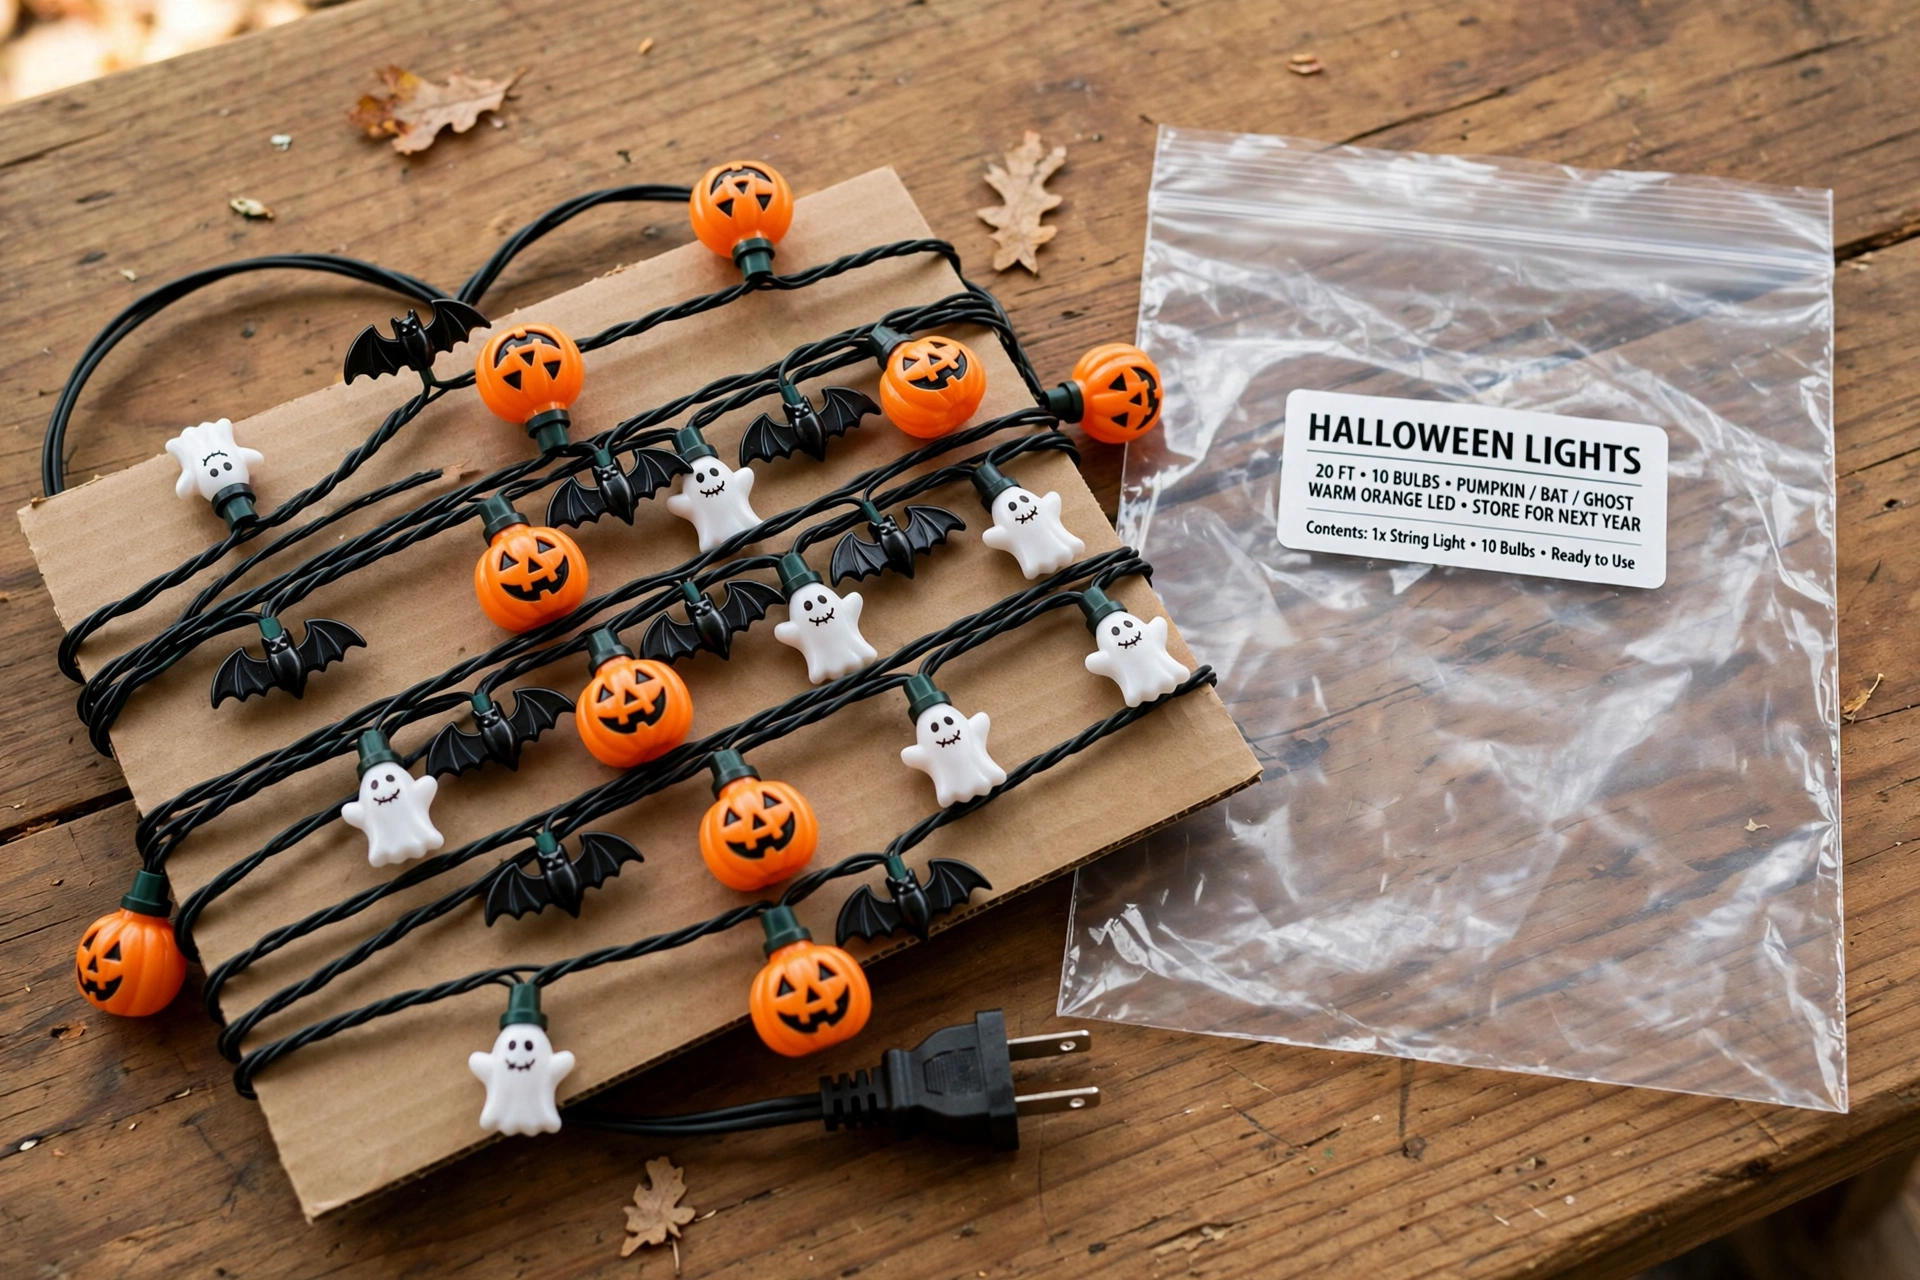
String lights are the decoration most people dread packing, and they are the easiest to get right once you know the trick. Test each set before you pack it, and replace any burnt-out bulbs now, while you still remember which strand had the problem. Then wind each strand loosely around a flat piece of cardboard or a light reel, and secure the ends with a twist tie or a rubber band. A wound strand comes out ready to hang; a loose strand comes out as a knot.
Bag each wound set with its battery box and remote in a zip bag, and label the bag by area: “front porch,” “banister,” or “living room windows.” Labeling by area is one of the best halloween lights storage habits, because next October you hang each bag where it belongs instead of sorting a pile of identical strands. Keep indoor lights and outdoor lights in separate bags, since outdoor sets are built to handle weather and indoor sets are not.
Check the cords as you wind them. A strand with cracked insulation, a crushed socket, or a scorch mark near the plug should be thrown away, not taped up and stored. A damaged cord is a fire risk, and no decoration is worth keeping a bad cord for. The same check applies to extension cords and timers — look them over, coil them loosely, and label them with the area they served.
Pack Masks, Costumes, and Fabric Decor
Latex is the material most likely to be ruined by bad storage, so latex mask storage deserves its own method. Wash the mask gently with mild soap and water, let it dry completely, then stuff it loosely with plain tissue paper so it holds its shape. Store it in a cool, dark, dry spot, away from heat, sunlight, and oils, and never seal a mask in an airtight bag while it is still damp. A mask stored flat under a heavy bin comes out creased, so give masks their own shallow box or the top layer of a bin.
Costumes need room to breathe. Hang structured costumes — anything with sequins, wings, or layered pieces — in a garment bag, where the shape stays natural and sharp creases cannot form. Basic costumes can go in vacuum-sealed bags to save space, but only when they are fully dry, and never for anything with structure or embellishment. Stuff hats and capes with tissue paper to keep their form, and keep small accessories like wands, belts, and gloves in a labeled zip bag with the costume they belong to. Good halloween costume storage is really just two rules: dry first, and never squash the shape.
Fabric ghosts and hanging decorations fold best when they are clean, fully dry, and folded loosely. Remove detachable supports like dowels or wire frames when you can, and bundle the supports separately with a label that says which ghost they belong to. A fabric ghost folded tight and pressed under a heavy bin comes out with creases that never quite fall out, so keep fabric pieces near the top of the bin, on top of the heavier items.

Inflatables, Skeletons, and Big Yard Props
Big props need a different plan than small ones, because they take up the most space and break the easiest. Deflate inflatables fully, clean them with a dry cloth, and fold them loosely — never press them into sharp corners or tight creases, because tight folds crack and thin the fabric over time. Roll rather than fold when you can, and store each inflatable in its own bag or bin so the fabric does not rub against a hard edge. Inflatable halloween decoration storage works best when the prop has room to breathe, so do not stack heavy bins on top of an inflatable.
Skeletons and large figures come apart more than you think. Take off the arms, legs, and heads where the joints allow it, and bag the small parts — hands, screws, stakes — in a labeled zip bag taped to the biggest piece. A skeleton stored in pieces takes half the space and breaks far less often than one stored whole. Wrap the joints in a soft cloth or bubble wrap if the figure is painted, because paint chips when pieces knock together in a bin.
Store big props upright when you can. Wall hooks and ceiling racks in the garage keep yard stakes, signs, and tall figures off the floor and out of the way, and they stay dry and safe up there. Anything too big for a bin — a giant spider, a tall sign, a fence panel — belongs on a hook or a rack, not leaning in a corner where it falls over and cracks. Heavy at the bottom, fragile on top, big props upright: that is the whole system for the yard pieces.
Wreaths, Paper Decor, and Fragile Pieces
A wreath needs support around its frame and clearance above its decorations, so it never goes at the bottom of a bin. Lay it in a shallow box large enough to hold it without bending the ribbon tails or crushing the flowers, spiders, and raised details. A wreath box, or a box lined with tissue paper, keeps the shape intact all year. If you have more than one wreath, stack them with a layer of tissue between them, never pressed flat against each other. Good halloween wreath storage is mostly about giving the wreath its own space.
Flat paper decorations — bats, silhouettes, window cutouts — store flat between sheets of clean tissue paper, sandwiched between two pieces of sturdy cardboard. A shallow box keeps the stack from sliding around, and the cardboard stops the edges from curling. Never roll paper decorations, and never fold them to fit a smaller box — a crease in a paper bat is permanent.
Figurines, ceramic pumpkins, and glass pieces go in their own small boxes with tissue paper or bubble wrap around each one. Pack them upright, not stacked on top of each other, and keep them in the top layer of a bin so nothing heavy sits on them. A figurine wrapped in tissue and boxed on its own comes out looking new; one tossed loose into a bin with a skeleton comes out chipped.
Choose the Right Bins and Label Them
Clear plastic bins with lids are the best home for Halloween decorations, because you can see what is inside without opening anything. Cardboard boxes attract pests and break down in damp air, so save them for the move and use plastic for storage. Pick bins with lids that snap tight, and keep the bins off the garage floor on a shelf, where water and pests cannot reach them. Halloween storage bins should be sturdy enough to stack, but never stack so high that the bottom bin bows under the weight.
Label every bin on two sides and on the lid, so you can read the label however the bin is stacked. A label that says “Halloween — lights, front porch” is worth more than a label that just says “Halloween,” because you will know which bin to open first next October. Write the contents in big, clear letters, and add the year if you rotate decorations. Labeling is the step most people skip, and it is the step that saves the most time — these halloween decoration storage ideas only work if you can find the bin you need without opening all of them.
Pack heavy at the bottom and fragile on top, in every bin. Heavy plastic pieces, stakes, and cords go in first. Fabric ghosts, masks, and figurine boxes go last, on top, where nothing presses on them. If a bin feels too heavy to lift comfortably, split it into two — a bin that is hard to carry is a bin that gets dropped, and a dropped bin is a broken decoration.
Where to Store the Bins
The best storage spot is cool, dry, and dark, with a steady temperature: a closet shelf, under a bed, or a climate-controlled storage area. Heat warps plastic, weakens glue, and damages latex, so a hot attic is the worst place for Halloween decorations. Damp basements bring mold, mildew, and corroded battery contacts, so they are the second-worst. A garage works for sturdy items — metal signs, heavy plastic bins of fabric decor, wooden pieces — but anything with wax, latex, foam, glue, or electronics does better in an interior closet or under a bed. The storage spot matters as much as the packing, and this is the part of halloween decoration storage ideas that most people get wrong.
| Storage spot | Best for | Avoid for | Why |
|---|---|---|---|
| Interior closet shelf | Masks, latex, electronics, candles | Very large props | Cool, dry, steady temperature |
| Under a bed | Flat paper decor, costumes in garment bags | Heavy bins | Dark, dry, easy to reach |
| Garage shelf | Sturdy plastic, metal signs, fabric bins | Latex, wax, batteries, electronics | Heat swings damage delicate items |
| Hot attic | Nothing delicate | Everything with latex, wax, foam, or glue | Heat warps plastic and melts wax |
| Damp basement | Nothing | Everything | Moisture brings mold and corrosion |
Our holiday decoration storage ideas guide uses the same rule for Christmas pieces: the spot decides how long things last, and a cool, dry shelf beats a hot attic every time. If you only have a garage, put the delicate bins on the highest shelf, away from the water heater and the furnace, and keep them off the floor. Our seasonal decor storage ideas guide follows the same shelf rule for the pieces that change with each season, because a bin you can reach is a bin you will actually use.
Keep the Halloween bins together in one spot, not scattered across the garage, the attic, and a bedroom closet. One shelf, one stack, one label system — that way next October you go to one place and bring out the whole collection. If your Halloween collection shares a shelf with Christmas, put the Halloween bins on top or in front, since they come out first. A single, labeled home for the season is the last step in halloween decoration storage ideas, and it is the one that makes next October easy.
Halloween Decoration Storage Checklist
Run through this list in the first week of November, and your decorations will come out ready next October.
- Photograph the display — porch, mantel, windows, and cords — before taking anything down
- Sort into keep, repair, toss, and donate; compost carved pumpkins within a few days
- Clean every piece and let it dry completely before packing
- Remove batteries from all lights, candles, signs, and animated figures
- Test string lights, replace dead bulbs, wind strands on cardboard, bag and label by area
- Wash and stuff latex masks with tissue paper; hang structured costumes in garment bags
- Deflate inflatables fully, dry them, fold loosely, and store each in its own bag
- Pack wreaths in shallow boxes with tissue; store paper decor flat between cardboard
- Use clear bins, labeled on two sides and the lid, heavy at the bottom, fragile on top
- Store bins in a cool, dry, dark spot — closet shelf or under a bed for delicate pieces
Frequently Asked Questions
When should I take down and store Halloween decorations?
Take everything down in the first week of November, as soon as Halloween is over. Carved pumpkins should be composted within a few days, before they rot and draw pests, and the rest of the decorations should be packed while you still remember how the display was set up. Packing in early November also means the weather is usually dry enough to air out fabric and inflatables outside. If you wait until December, the decorations sit out in the rain, the batteries stay in for another month, and the whole job takes twice as long. Our holiday lights storage ideas guide follows the same first-week timing for string lights, because lights left up through a rainy month come down tangled and corroded.
How do I store Halloween string lights so they do not tangle?
Wind each strand loosely around a flat piece of cardboard or a light reel, secure the ends with a twist tie, and put the wound strand in a zip bag with its battery box and remote. Label the bag by area — “front porch” or “banister” — so you know where it goes next year. Test the strand before you pack it and replace any dead bulbs now. Never toss a loose strand into a bin, and never wrap a strand tightly around itself, because a tight wrap stresses the wire and a loose pile knots. A strand wound on cardboard comes out ready to hang in under a minute.
Can I store Halloween decorations in the attic or garage?
You can store sturdy items in the garage, but a hot attic is a bad home for most Halloween decorations. Heat warps plastic, softens wax candles, makes latex masks sticky, and weakens glue joints, while a damp basement brings mold and corroded battery contacts. The best spot is a cool, dry, dark place with a steady temperature — a closet shelf or under a bed — and the garage is fine for sturdy pieces like metal signs and heavy plastic bins of fabric decor. Keep delicate items indoors, keep bins off the floor on a shelf, and keep them away from the water heater and the furnace. If you want a deeper guide to storing seasonal pieces, the TGC Gear guide to storing Halloween decorations walks through the same spot rules with a clear checklist for each material.
How do I keep latex masks and costumes from getting ruined in storage?
Wash the mask gently, let it dry completely, stuff it loosely with plain tissue paper, and store it in a cool, dark, dry spot away from heat, sunlight, and oils. Never seal a damp mask in an airtight bag, and never store it flat under a heavy bin. Hang structured costumes in a garment bag so the shape stays natural, and keep small accessories in a labeled zip bag with the costume they belong to. A mask or costume that goes away clean, dry, and supported comes out next October looking the way it did this year.
Pack It Away Now, Thank Yourself Next October
A Halloween collection does not need fancy containers, and it does not need a whole room of storage. It needs clean, dry pieces, packed by material, in clear labeled bins, in a cool, dry spot. Photograph the display, sort the keepers from the broken pieces, clean everything and let it dry, take the batteries out, wind the lights on cardboard, stuff the masks with tissue, and fold the inflatables loosely. That is what halloween decoration storage ideas are for: a pack-away that takes one afternoon and makes next October the easiest setup of the year.
These halloween decoration storage ideas will not make November fun — but they will make next Halloween start with bins you can open and use, instead of a knot of dead lights and a squashed mask. Pack it away with care now, and next October will thank you.